Discover how to care for your makeup brushes to ensure they stay in top condition. Invest in your makeup brushes by maintaining them properly for long-lasting, flawless results. Makeup brushes are essential tools for achieving a polished, professional look. Whether you’re blending foundation or adding the final touches with blush, high-quality brushes help apply makeup more smoothly and evenly. However, even the best makeup brushes can deteriorate if not properly maintained.
Why Makeup Brush Maintenance is Important,Consider factors like longevity, hygiene, and makeup application
When properly maintained, makeup brushes can last for years, ensuring a better investment in your beauty tools. Brush care goes beyond aesthetics; it’s essential for both hygiene and makeup performance. Here’s why maintaining your makeup brushes should be part of your regular beauty routine:
Longevity of Brushes
Well-maintained brushes last longer. By properly caring for your brushes, you can prevent bristles from fraying, breaking, or losing their shape. Regular cleaning and storage can keep your brushes performing like new for years, saving you the cost of constant replacements.
Hygiene and Skin Health
Makeup brushes accumulate dirt, oils, dead skin cells, and bacteria over time, especially if they are used daily. Failing to clean your brushes regularly can lead to skin breakouts, infections, and irritation. Dirty brushes can harbor harmful bacteria that transfer onto your face, exacerbating skin conditions like acne or dermatitis. Keeping your brushes clean is critical for promoting healthy skin.
Consistent Makeup Application
When your brushes are dirty or misshapen, they don’t perform as effectively. Bristles may clump together or shed onto your face, resulting in an uneven makeup application. Clean brushes provide smoother, more precise results, making your makeup routine easier and faster. Regularly maintaining your brushes ensures you get the flawless finish you want every time.
Step-by-Step Guide to Cleaning Makeup Brushes
To keep your brushes in top condition, regular cleaning is a must. Here’s a comprehensive guide on how to properly clean your brushes, ensuring they remain hygienic and effective.
Frequency of Cleaning
The frequency with which you should clean your makeup brushes depends on the type of product you’re using and how often you use them.
- Foundation and Concealer Brushes: Clean these weekly due to the oil-based products they come into contact with.
- Powder and Blush Brushes: Clean these every 2-3 weeks.
- Eye Shadow Brushes: Clean these every 1-2 weeks, especially if you use multiple colors.
Cleaning Products
There are many options available for cleaning your makeup brushes.
- Specialized Brush Cleansers: These are formulated specifically for makeup brushes and can be very effective.
- Gentle Shampoos: Baby shampoo or a mild facial cleanser can also be used.
- Dish Soap: A gentle dish soap can be effective for removing heavy makeup.
- Makeup Remover: Oil-based makeup removers can help break down stubborn makeup.
Step-by-Step Cleaning Process
- Wet the Bristles: Run your brush under lukewarm water, avoiding the handle to prevent water from seeping into the glue holding the bristles. Focus on just the bristles.
- Apply Cleanser: Add a small amount of your chosen cleanser to the palm of your hand or a brush-cleaning mat. Gently swirl the brush in circular motions to create a lather, ensuring the bristles are fully coated with cleanser.
- Rinse and Repeat: Rinse the bristles under lukewarm water, continuing to swirl the brush until the water runs clear. Repeat if necessary to remove all makeup residue.
- Squeeze Out Excess Water: Gently squeeze out excess water from the bristles without pulling on them. Be careful not to tug or twist the bristles, as this can cause them to lose their shape.
Proper Drying Techniques To ensure your brushes dry properly and maintain their shape, follow these tips:
- Avoid direct heat: Do not use a hair dryer or place brushes near a heat source. High heat can damage the bristles and the glue holding them in place.
- Reshape the bristles: Gently reshape the bristles back to their original form while the brush is still slightly damp.
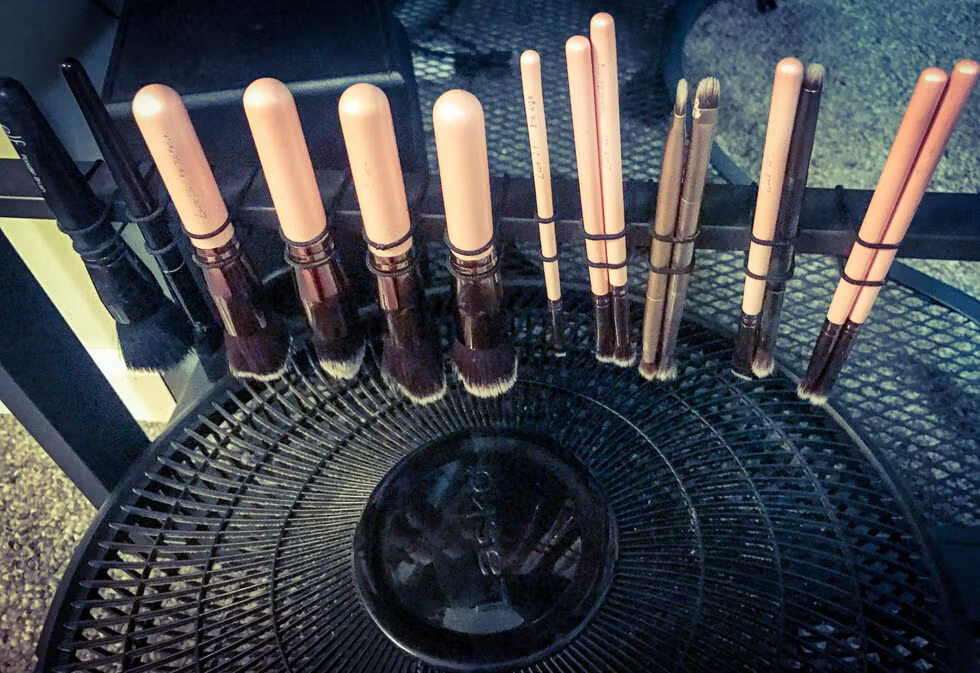
- Lay flat to dry: Place the brushes flat on a clean towel with the bristles hanging over the edge. This allows air to circulate around the bristles and prevents water from seeping into the ferrule.
- Avoid upright position: Do not stand the brushes upright to dry, as this can cause water to pool in the ferrule and damage the brush.
- Allow ample drying time: Allow the brushes to dry completely before using them again. This usually takes several hours, depending on the size of the brush and the humidity.
Storage Tips
Once your brushes are completely dry, it’s important to store them properly to maintain their shape and prevent bacteria growth. Here are some tips:
- Use a brush guard: A brush guard can help protect the bristles and maintain their shape.
- Store upright: Store your brushes upright in a cup or holder to prevent the bristles from bending out of shape.
- Avoid damp environments: Keep your brushes away from areas with high humidity, such as bathrooms.
- Keep them clean: Before storing your brushes, make sure they are completely clean and dry.
- Avoid overcrowding: Avoid storing too many brushes in one container, as this can cause the bristles to become bent or damaged.
Drying Makeup Brushes Correctly
After cleaning, it’s important to dry your brushes correctly to avoid damaging them. Improper drying techniques can shorten the lifespan of your brushes and affect their performance.
Avoiding Damage
Brushes should be air-dried to prevent water from loosening the glue in the ferrule (the metal part of the brush that holds the bristles in place). Avoid standing your brushes upright to dry, as water can seep into the ferrule and weaken the glue.
Instead, lay your brushes flat on a clean towel with the bristles hanging off the edge. This allows the air to circulate around the bristles, helping them dry more quickly and thoroughly.
Shaping the Bristles
After cleaning, gently reshape the bristles to maintain the brush’s structure. This step ensures that your brush retains its original form, which is essential for applying makeup accurately.
Drying Time
Depending on the brush size and thickness, drying time can range from a few hours to overnight. Speed up the process by placing your brushes in a well-ventilated area or near a fan, but avoid using heat sources like hair dryers, as they can damage the bristles.
Proper Storage Tips for Makeup Brushes
Proper storage is another critical part of maintaining your brushes. How you store your brushes can affect their lifespan and performance.
Avoid Moisture and Dust
Always store your brushes in a dry, clean area. Bathrooms are not the best place to keep makeup brushes due to the high humidity, which can encourage bacteria growth and damage the brush handles. Consider storing your brushes in your bedroom or dressing area instead.
Storage Containers
Invest in a brush holder or a closed container to protect your brushes from dust and dirt. Brush holders with individual slots for each brush are ideal as they prevent the bristles from bending. For those who travel frequently, roll-up brush bags or travel cases are great for keeping brushes protected while on the go.
How to Care for Different Types of Brushes
Different types of brushes require different care techniques based on their material and shape. Here’s how to properly maintain both natural hair and synthetic brushes.
Natural Hair Brushes vs. Synthetic Brushes
- Natural Hair Brushes: These brushes are made from animal hair (like goat or sable). They are softer and more delicate, requiring extra care. When cleaning natural brushes, consider using a small amount of hair conditioner after washing to keep the bristles soft and hydrated.
- Synthetic Brushes: Made from man-made fibers, synthetic brushes are easier to clean and maintain. They tend to dry faster and don’t require conditioning.
Different Brush Shapes
Flat, fluffy, and angled brushes all require specific care to maintain their unique shapes. After washing, be sure to reshape the bristles according to their original design, ensuring they dry properly for future use.
Signs It’s Time to Replace Your Brushes
Even with proper maintenance, makeup brushes won’t last forever. Here are some signs that it might be time to replace your brushes:
Shedding Bristles
If your brush is consistently shedding bristles, it may be a sign that the glue in the ferrule has weakened or the bristles have become too worn out.
Frayed or Misshapen Bristles
Brushes that can no longer hold their original shape or have frayed significantly may not perform as well. Misshapen brushes can make it difficult to achieve a smooth makeup application.
Persistent Stains or Smells
If your brush still looks dirty or smells unpleasant after washing, it’s probably time to replace it. Stains and smells can indicate deeply embedded bacteria or product buildup that won’t come out.
Bonus Tips for Prolonging Brush Life
Here are a few extra tips to keep your brushes in top shape:
Avoiding Heat
Keep your brushes away from direct sunlight or heat sources, as they can dry out and damage the bristles.
Regular Spot Cleaning
Between deep washes, use a quick spot cleaner or rubbing alcohol to keep your brushes clean. This can help prevent bacteria buildup and prolong the time between washes.
Conclusion
Maintaining your makeup brushes doesn’t have to be a chore, but it’s essential for both your skin’s health and the performance of your makeup tools. Regular cleaning, proper drying, and careful storage can help your brushes last longer and deliver better results. By incorporating these practices into your beauty routine, you can enjoy flawless makeup application every time.


Recent Comments